Monday 23 June 2014

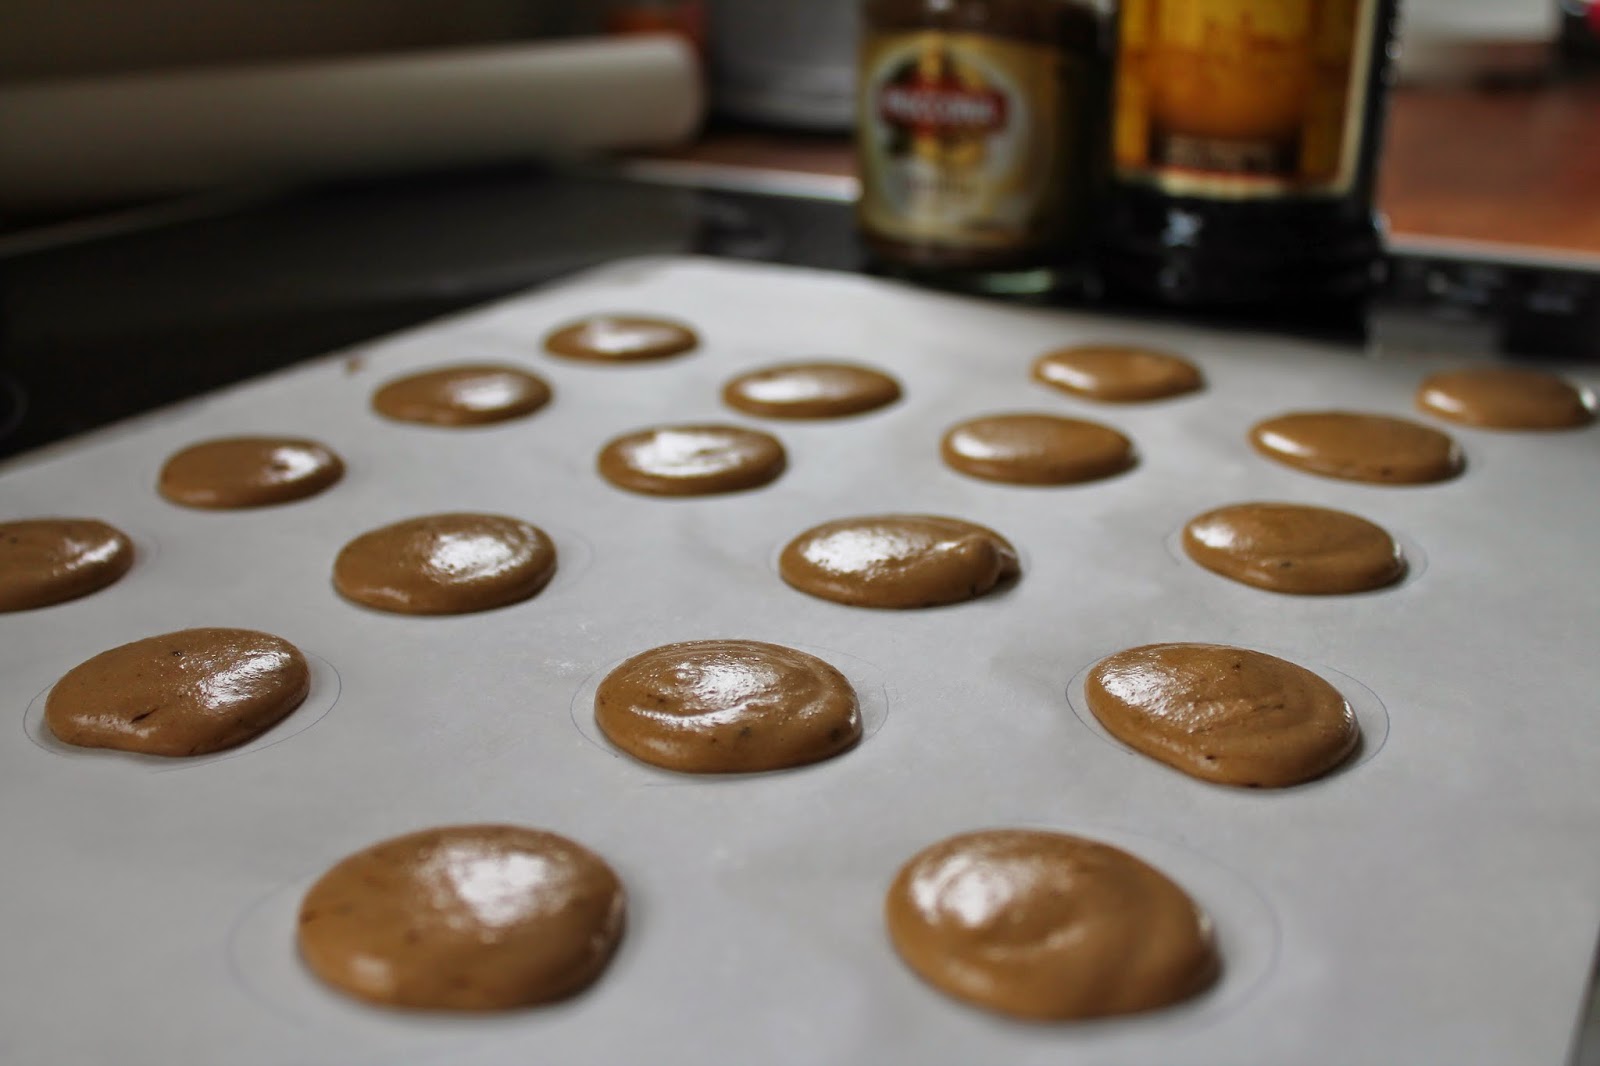
Coffee Kahlua Macarons

COFFEE KAHLUA MACARONS

Hey guys, I'm back! Where have I been? Eating macarons of course! Trust me, if you make these, you may just disappear for a while too! One bite and you will be whisked away to some cute little cafe on the streets of Paris. 

Recipe adapted from Martha Stewart

Ingredients:

1 cup icing sugar
3/4 cup ground almonds
2 large egg whites
Pinch of cream of tartar
1/4 cup caster sugar
1 tsp instant coffee granules

Espresso kahlua filling:
100g butter, softened
1 cup icing sugar
2 Tbsp Kahlua
2 Tbsp strong espresso coffee

Directions:

1. Preheat oven to 160 degrees Celsius (roughly 325 degrees Fahrenheit). Line oven trays with good quality baking paper, or if the baking paper is thin use two layers.

2. Process the ground almonds and icing sugar in a food processor until fine. Sift three times, each time leaving out the lumps of almond that is left in the sieve. 

3. Beat the eggs with an electric mixer on medium speed until frothy. Add the cream of tartar. Mix on high speed until soft peaks form. Add the instant coffee and caster sugar. Continue mixing until stiff peaks form.

4. Sift the almond mixture into the egg mixture. Using a rubber spatula, gently fold the two mixtures together. This step is very important. If you fold too little, the macarons will crack. If you fold too much, the macarons will flatten and merge together into a sticky mess. In order to have a nice smooth macaron with a slight cap, and the all-important feet, you need to fold the mixture just right. Depending on your folding, this may take 50-80 folds. When you lift the spatula from the batter, the batter should flow off the spatula in a continuous line of the batter. 

5. Once this step is done, the batter should be spooned into a piping bag with a 1/2 inch round tip. Pipe 3/4 inch rounds onto the baking paper, one inch apart. It may be helpful to draw circles onto the baking paper before you start this step. Once the macarons are piped out, give each tray a good firm tap on the bench to release any trapped air, which would cause the macarons to turn out hollow. 

6. The next step is important. The macarons should be left at air temperature for 30-45 minutes to form a skin. The macarons should lose their shine and appear dull. When touched, they should not be sticky because a skin has formed. 

7. Meanwhile, make the buttercream filling by mixing the softened butter and icing sugar in a bowl, and stirring in the Kahlua and coffee.

8. Bake the macarons a tray at a time in the oven for 15 minutes, being careful not to burn them. See oven temperature tips below.

9. Once out of the oven, leave for 2-3 minutes before removing each shell from the tray. Cool, and then play a matchmaking game! Find each macaron shell a matching shell of the same size and shape, then spread one side with the buttercream filling and sandwich together. 

10. Enjoy! Even if your macarons don't turn out perfect, I guarantee they will still taste good. 


Let me know if you give these a go! Making macarons seems to get easier and easier each time, and I love trying new flavour combinations. 

X
Molly

Wednesday 12 March 2014

I've got the summer blues..

Left to right: Sabo Skirt Lullaby overalls, Princess Polly Alabama dress, Forever New Lucille dress, Forever New Alysa dress, Sabo Skirt Voyage denim shortsJust Jeans Checkmate tank

A trend I've been loving all summer has been blue and white, particularly porcelain print dresses and the look of crisp white against denim or chambray. I've put together some of my top picks.

What is your fave summer look? I know so many of you are in the midst of winter and I've been bookmarking some of your winter looks because that time will soon be here for us! I particularly love this look from Taz and Bear.

X
Molly

Wednesday 26 February 2014

YouTube made me do it


As I mentioned in my last post, I'm on a mission to find my holy grail beauty products this year. I've been an everyday makeup wearer for a long time now, but I've never really experimented with different products. 

After hearing many a beauty guru rave on about how amazing certain 'drugstore' products are, I decided to bite the bullet and spend all my money make a few online purchases. Here in New Zealand our makeup choices are very limited, we really only have a few big brands such as Loreal, Maybelline, Covergirl, Rimmel and Revlon, and I think the stores stock only a limited range here compared to overseas. Not to mention, everything is extremely expensive!

The products I bought were all recommended by beauty vloggers on YouTube, particularly Shaaanxo (a fellow kiwi), Fleur deForce, and Karissa Pukas. I'd never heard of brands like NYX, Elf and Wet n Wild before, so I was super excited to try them out, especially when I found out how cheap they are.


The products I got are:

-Covergirl Outlast 3-in-1 foundation in 825 buff beige
-Maybelline Instant Age Rewind Eraser for Dark Circles in light and neutralizer
-Rimmel Match Perfection concealer in 230 fair/light
-Garnier Roll-on Anti-Dark Circles in fair
-Rimmel Stay Matte pressed powder in translucent
-NYX Powder Blush in angel
-NYX Cream Blush in boho chic 
-Elf Baked Blush in Pinktastic (used as a highlighter)
-NYC Smooth Skin Bronzing Face Powder in sunny
-Elf Eyebrow Kit in ash
-Jordana Brow Powder Duo in 01 light
-Wet n Wild Color Icon Brow and Eye Liner in 648 Taupe

What are your favourite drugstore products and who are your favourite beauty bloggers/YouTubers?

X
Molly


Friday 24 January 2014

In the summertime

Its summer here in New Zealand, although we haven't had too many of those long hot days that just epitomise summer yet. I haven't done much blogging lately, but this is what I've been up to:

  • Having date nights. We love nothing more than snuggling up with a platter full of food and a nice glass of wine. 
  • Gardening. This is the first year I've been in charge of the vege garden and I'm loving it! We are eating lots of home-grown strawberries and tomatoes at the moment. 
  • We've been making omelettes most weekends with fresh veges from the garden, and eggs from a friend's hens.
  • Baking bread. Having a bread maker is so handy for making everything from loaves of bread to pizza dough, cinnamon buns and focaccia. Soon I'll be making hot cross buns again!
  • Buying new makeup. This year I'm on a search for my holy grail makeup products (and slowly becoming addicted to beauty gurus on YouTube).
  • I just bought a lion mane online for Smudge, can't wait till it arrives! I'm not usually one for dressing up pets but I just couldn't resist.
  • I've also been flying! My brother has his license so I've been lucky enough to see New Zealand from the air. That second-to-last picture is just one of many beautiful beaches we flew over.
What have you guys been up to lately? I have a lot to catch up on.

X
Molly


Saturday 21 December 2013

DIY Christmas Gift Ideas


How is everyone's Christmas shopping going? I was very organised this year and started buying a few presents back in August. Whenever I saw something I thought would make a good present for someone on my list, I just bought it and put it away in the cupboard. Of course, there are always those people who are hard to buy for, and in the days leading up to Christmas I usually end up picking up some sort of gift set or a box of chocolates. 

If this sounds anything like you, why not make a few gifts yourself this year? A homemade gift is much more thoughtful than the generic box of chocolates, and they're pretty fun to make! Here are some ideas:


This DIY mint and honey lip scrub by A Little Glass Box makes my mouth water, and is so nicely packaged.

Edible goodies are always a good idea! Why not make this brownie mix from Call me Cupcake, or a delicious lemon loaf.
These personalised coffee mugs from A Beautiful Mess are an awesome idea!
I can smell these delicious bamb bombs from Spreading Sunshine already! 


I've always wanted to try making soap, and these orange and tea-tree soaps from Offbeat and Inspired would make this perfect Christmas gift. 

You could also think about making my DIY teacup candles, DIY Christmas muesli, or my cute Shrewsbury Drops. My macarons would also make a great gift and can be packaged up so nicely!

Are you still doing last-minute shopping? The crowds get crazy this time of year!

X
Molly

Monday 11 November 2013

Lavender Macarons with Honey Earl-Grey Buttercream

There is something soothing about making macarons. I enjoy spending a weekend afternoon mixing, piping, baking and then filling the delicate shells, and experimenting with different flavour combinations. This time I decided to make lightly-flavoured lavender macarons using lavender sugar, and I paired them with a basic buttercream infused with earl-grey tea and clover honey. I decided to use the same recipe as I used to make my raspberry macarons with raspberry buttercream filling, with a few tweaks.
LAVENDER MACARONS WITH HONEY EARL-GREY BUTTERCREAM

Ingredients:
1 cup icing sugar
3/4 cup ground almonds
2 large egg whites
Pinch of cream of tartar
1/4 cup lavender sugar
1/2 tsp purple food colouring 

Honey earl-grey buttercream:
100g butter, softened
1 cup icing sugar
1 Tbsp honey
2 tsp earl-grey tea leaves steeped in 2 Tbsp boiling water

To make the lavender sugar:
Measure out 1/4 cup caster sugar into a bowl. Add several sprigs of lavender and leave, covered, overnight. The lavender oils will infuse into the sugar to make a lovely lightly-flavoured lavender sugar. Discard the lavender and sift before using to get rid of any left-over lavender.  

Directions:

1. Preheat oven to 160 degrees Celsius (roughly 325 degrees Fahrenheit). Line oven trays with good quality baking paper, or if the baking paper is thin use two layers.

2. Process the ground almonds and icing sugar in a food processor until fine. Sift three times, each time leaving out the lumps of almond that is left in the sieve. 

3. Beat the eggs with an electric mixer on medium speed until frothy. Add the cream of tartar. Mix on high speed until soft peaks form. Add the food colouring and lavender sugar. Continue mixing until stiff peaks form.

4. Sift the almond mixture into the egg mixture. Using a rubber spatula, gently fold the two mixtures together. This step is very important. If you fold too little, the macarons will crack. If you fold too much, the macarons will flatten and merge together into a sticky mess. In order to have a nice smooth macaron with a slight cap, and the all-important feet, you need to fold the mixture just right. Depending on your folding, this may take 50-80 folds. When you lift the spatula from the batter, the batter should flow off the spatula in a continuous line of the batter. 

5. Once this step is done, the batter should be spooned into a piping bag with a 1/2 inch round tip. Pipe 3/4 inch rounds onto the baking paper, one inch apart. It may be helpful to draw circles onto the baking paper before you start this step. Once the macarons are piped out, give each tray a good firm tap on the bench to release any trapped air, which would cause the macarons to turn out hollow. 

6. The next step is important. The macarons should be left at air temperature for 30-45 minutes to form a skin. The macarons should lose their shine and appear dull. When touched, they should not be sticky because a skin has formed. 

7. Meanwhile, make the buttercream filling by mixing the softened butter and icing sugar in a bowl. Microwave the honey for 20 seconds to soften it slightly, and add this to the buttercream mixture. Make a strong brew of earl-grey tea using 2 tsp tea leaves steeped in 2 Tbsp boiling water, and stir this in to the buttercream. 

8. Bake the macarons a tray at a time in the oven for 15 minutes, being careful not to burn them. See oven temperature tips here.

9. Once out of the oven, leave for 2-3 minutes before removing each shell from the tray. Cool, and then play a matchmaking game! Find each macaron shell a matching shell of the same size and shape, then spread one side with the buttercream filling and sandwich together. 

10. Your macarons are ready! Take your first bite before everyone else swoops in. Even better, hide them away and don't tell anyone you made them! Macarons? What macarons?!


Before you start baking, have a look at my tips and tricks for making macarons. But remember - the second most important step in the macaron-making process is getting the macaronage right. If you fold too much or not enough, your macarons will not turn out with feet and a nice smooth cap. 

The first most important step? Just do it! Don't be put off by all the articles around the net stating the do's and don't's of making macarons. Just have a go, and if they don't work out the first time try to work out what went wrong, and have another go! Making a whole batch of macarons is much cheaper, and more satisfying, than buying them one at a time from that little french bakery. 

X
Molly

Friday 25 October 2013

A rainy spring day and a cat dress


What I'm wearing: Temt dress, Glassons anorak, thrifted satchel, shoes from Number One Shoes

How cool is it that there are so many cat-related clothes, shoes and even hats out there at the moment? Speaking of cats, these shoes are no longer wearable because Smudge attacked them! He's ruined my best two pairs of shoes now, but he's such a sweetie I can't stay angry with him for long. 

Hope you all have a lovely weekend, its a long one for us here in Kiwi-land!

X
Molly

Related Posts Plugin for WordPress, Blogger...