Showing posts with label DIY. Show all posts

Wednesday, 9 October 2013

DIY Coconut and Lemon Body Scrub


My skin is in dire need of some TLC after being covered up all winter, so I thought I'd make some sugar scrub. I love the feel of my skin after having a good scrub in the shower, and then smothering it with body butter. 

The best thing about making your own body scrub is that you know exactly what goes in to it, and you probably have most of the ingredients in your house already. With all the chemicals I put onto my body and face daily, its good to be able to use some natural products for a change.

Coconut and Lemon Body Scrub


You will need:

2 C sugar
1/4 C coconut oil
1/4 C olive oil
1/4 C shredded coconut
Juice and rind of one lemon

Directions:


1. Add the sugar, coconut, and lemon zest to a mixing bowl.


2. Add the oils and the lemon juice and mix it all up. 
3. Find a pretty jar for your sugar scrub4. Fill the jar with your scrub and get scrubbing! Its as easy as that.

Smooth legs, feet and hands are only minutes away! 

X


Molly


Monday, 29 July 2013

DIY: Photoframe


I bought this old wooden frame from a second hand shop ages ago and I've been meaning to do something with it, so I thought I'd give it a lick of paint and use it to display photos. 


What you'll need:

A wooden frame
Paint
Sandpaper
Twine or string
Small nails or tape
Wooden pegs
Photos or nice things to display

How to:

1. Find an old wooden frame. You may find one that is already empty, or one that has a print that you don't like which you can take out.


2. Give the frame a paint. I gave it a distressed look by using my scratchiest bank brush and brushing the paint on very thinly. I also sanded back the edges once the paint was dry. If you prefer, you can paint the frame nicely using two or three coats.


3. If you're using nails: Work out how many rows of twine you want and where you want them. Hammer in a nail on each side of the frame for each row of twine, using a ruler to ensure the twine will be straight. Tie the twine around the nails on each side.

If you're using tape: Work out how many rows of twine you want and where you want them. Tape a piece of twine to one side and then use a ruler to find the point on the opposite side where it should be taped.


Step 4: Use wooden pegs to attach photos, postcards or anything else you want to display.


I hope you like it!

X
Molly

Wednesday, 12 June 2013

DIY Ideas

I'll be finished with my exams soon so I'm looking for a few DIY projects to do, to liven up our home. Its on my list of 23 before 24, so I've been looking for some ideas on Pinterest. Hopefully I'll be able to get started on some projects of my own very soon!

Here's what I have my eye on so far:

Love this pretty tin, and I love the idea of recycling pallets.
1/2

Since we live in such a small place, I'm always looking out for cute and practical storage solutions.
3/4

How pretty are these fabric covered coathangers, and this lace chandelier?
5/6

Love the idea of making something plain into something pretty using fabric or paper:
7/8


Have you done any DIYs lately? Leave me a link!

X
Molly

Wednesday, 27 February 2013

DIY Vintage Teacup Candles


What you'll need:
800g  candle wax (makes three teacup candles)
Fragrance oil
Candle wicks
Skewers
Vintage teacups and saucers
Heat-proof bowl
Pan


What to do:

First, you need to place the wicks into the teacups.  To keep them in place, make a sweet little tool out of skewers - hold two skewers together and tape each end.  Then sit the wick in between the two skewers.


Measure out the wax into the heatproof bowl and set it over a pan filled with boiling water on the heat.


When the wax has melted, add the fragrance oil.  The amount depends on the quality of the oil and how scented you want the candles to be, but usually a couple of tablespoons is enough.

Pour the wax into the teacups and make sure the wick is in the centre.  

Wait for the candle wax to set and then cut the wick to size.  


Now you're ready to enjoy your candles!  I love the lovely french vanilla scent of mine.

Check back tomorrow for my February sponsor giveaway - lots of great prizes!

X
Molly

Sunday, 3 February 2013

DIY Valentines: Shrewsbury Drops


Hi all! As promised in this post, I have got creative and come up with my own DIY gift for Valentines Day.  These shrewsbury drops with heart-shaped jam filling are super yummy, with a subtle lemon flavour.  Try them out!

Shrewsbury Drops

125g butter
125g sugar
1 egg
1 Tbsp grated lemon rind
180g flour
60g custard powder
1 tsp baking powder
raspberry jam


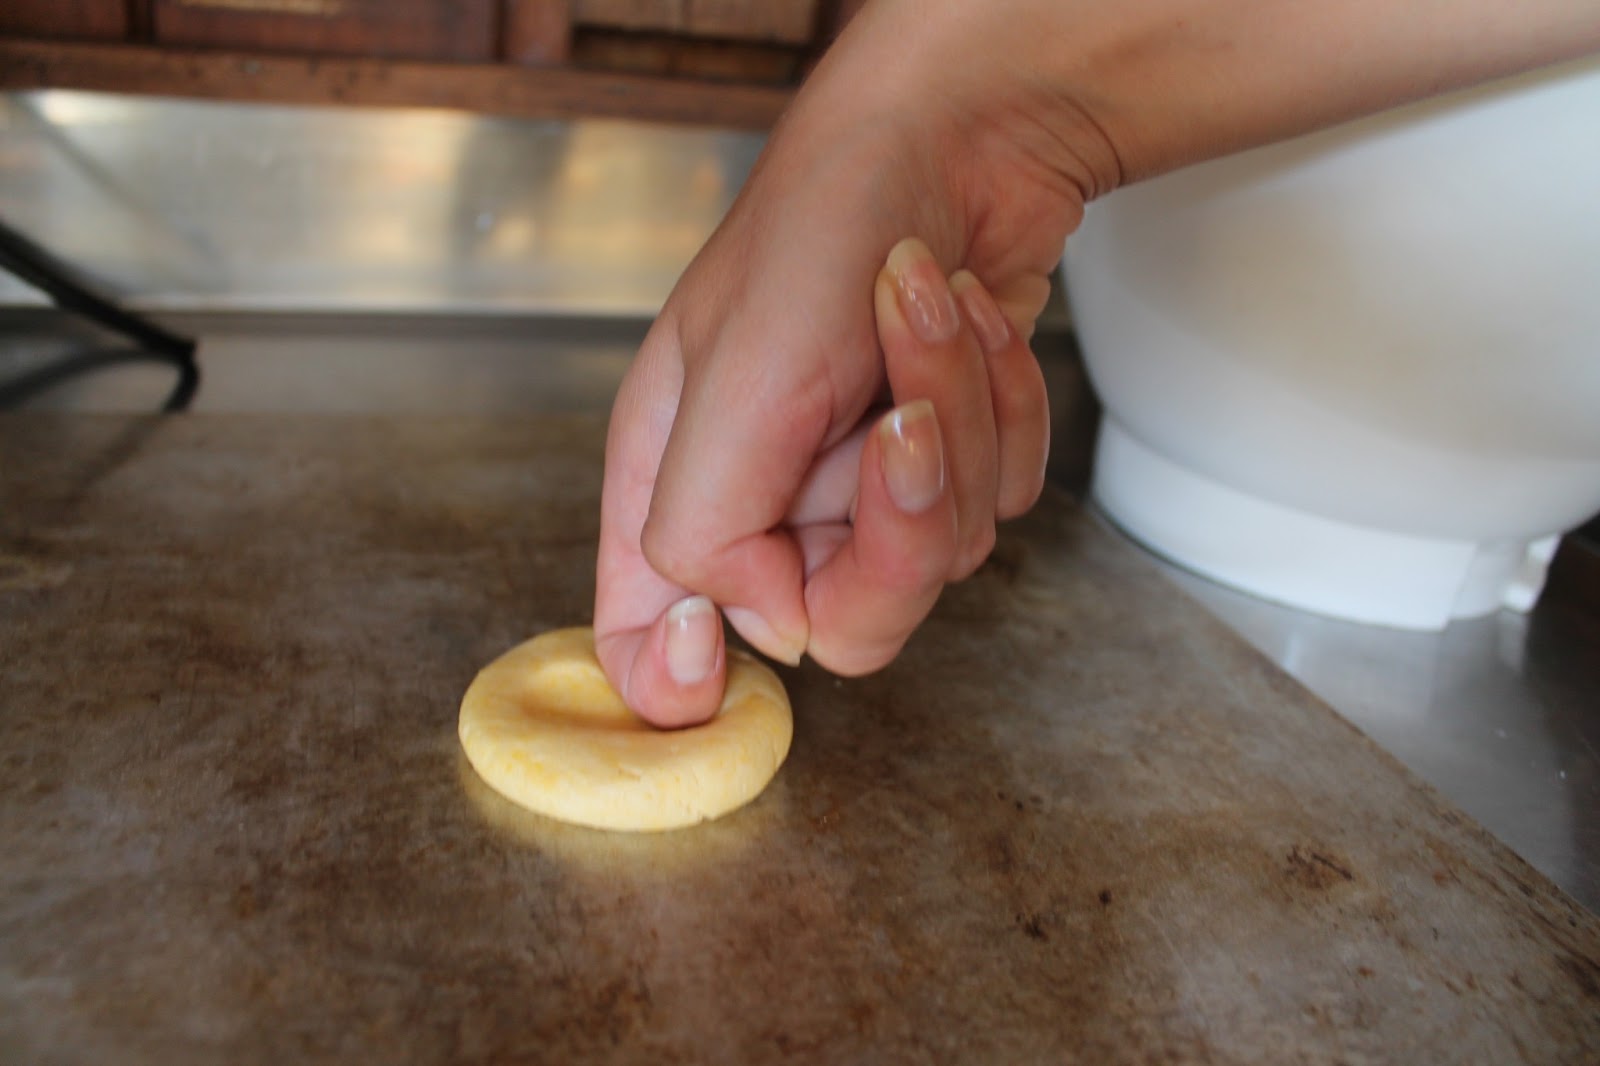
Cream butter and sugar until light and fluffy.  Add egg and lemon rind and beat again.  Add sifted dry ingredients and mix well.  Make mixture into small balls and place on a baking tray.  Flatten biscuits slightly.

Using your finger, make a heart shaped indent (shown below).  


Spoon jam into indent and spread with fingers.

Bake at 170 degrees Celcius from 15 minutes or until golden brown.

Make into cute parcels for valentines gifts, or serve in a bowl with a red ribbon like I have.


Hope you enjoy these!

X
Molly

Monday, 3 December 2012

DIY Christmas Gift: Homemade Muesli


Happy December!  It is time to start thinking about Christmas gifts, and I love the idea of gifting handmade items.  To me, a handmade gift is so much more personal, and it can save the gift-giver a few bob too!

I make this muesli fairly regularly, it is so much nicer than the store-bought stuff.

It is nice on its own, but I sprinkle it on top of my Weetbix (breakfast of the All Blacks!)

Don't you think it would make a nice Christmas gift? 


Home-made Muesli

Ingredients

800g   Rolled Oats
300g   Wheatgerm
420g   Brown Sugar
2 C    Bran Flakes
1 C    Coconut
2 Tbsp Cinnamon
1 Tbsp Mixed Spice
1 C    Oil
1 C    Milk or Water
Your choice of dried fruit and nuts


Mix all the dry ingredients in a big bowl or container, before adding the wet ingredients.  Mix well using clean hands until texture is even.

Spread into a large roasting pan and cook at 180 degrees celcius for 60 minutes.  Stir every 10 minutes.  Add coconut in the last 10 minutes.


Wait until muesli has cooled, and then add your choice of dried fruit and nuts.  In this batch I used dried apricots and sultanas, other times I use sliced almonds and cranberries.


Put into pretty jars.


Finally, make a pretty label.  This one is made using white card.  Screw up the card a little, and use a teabag wet with hot water to stain the card.  I used letter stamps to write on it, but handwriting can be just as effective.  Lastly, I tied the label on using home-made baker's twine (tutorial found here).

X
Molly


Monday, 1 October 2012

Corners of my home: Bedroom

Some sneak peaks of our bedroom.

How to get the look:

The 'LOVE'sign is simply made of wooden letters that have been covered with scrapbook paper.

The plates have been collected from op shops for next to nothing, and are just blu-tacked to the wall (I can't resist a good plate wall!).  I tried to get some plates that were a unique shape, and mixed them in with plainer ones!


Related Posts Plugin for WordPress, Blogger...